
Its May! What a lovely time of year. Its when all the flowers are supposed to come out! Last week I was particularly excited to receive my lovely dt pack! It took me all of 2 seconds to get some ideas in my head of what I wanted to do. Of course, as usual, nothing went the way I planned it but I still love how this weeks make came out!
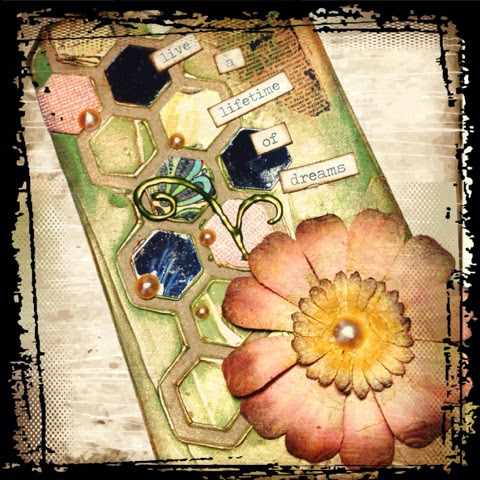
I started off with my tim holtz tag die which I covered with some modelling paste that I had coloured up using some gold and green paint. I received some lovely patterned papers from Julie and I knew that I wanted to use them with this fun frameworks die by tim holtz. Among the papers was some graphic 45, some core-denations cardstock and some kraft card that was lined like notebook paper. I cut these several times along with some mirror board by tim, so as to have a mix of hexagons to work with. Before the modelling paste had dried I pressed a few of these paper shapes into it and pushed down slightly to get a bit more texture.

I put my tag to the side and while the modelling paste was drying, I took some liquid pearls in corresponding colours and created a few different size pearls and shapes on my non stick craft sheet.

Then I took some plain paper flowers that I had and coloured them with matching ink and gold paint watered down with gold shimmer spray.

I left my tag, my flowers and my embellishments overnight to dry before moving on. I rarely do this as I get too excited about wanting to see the finished product but when you are working with so many things that can easily be smudged or altered with inky fingers or pressure, its best to leave them to dry as long as you can. A heat gun works at times, like for example my flower, but using the heatgun on modelling paste can cause it to bubble and that was not my desired effect for this tag. On occasion I do use the heat gun and purposefully cause the bubbling for texture. This also works with paint. However today I was sensible and left it alone!
Once my tag had dried along with all the extra bits I created, I moved on using some lovely pan pastels I had been provided with. I used a mixture of light gold and bronze which I sponged over the entire tag. This really gave the bumps and ridges of the modelling paste some emphasis. Sadly, it was not easy to capture by camera but it was gorgeous! I think I sat staring at it for a little while afterwards!

To finished it off, I added a bit more mirrored tiles, a rub on (which tbh I could have done without) and I created my own sentiment using Tim Holtz chit chat stickers which I edged with distress ink. I also added the flower which I had inked up the night before and my liquid pearl embellishments.

To finish the tag off I threaded a bit of ivory lace through the hole at the top. When I first did this, I pulled the lace a bit too tight and ripped it right out of the tag! As frustrating as it was, I wasn't prepared to redo the tag so for a quick fix I stuck some thick cardstock to the back of the tag along with the tiny bit of tag that got pulled off. I then punched a hole where it was previously and CAREFULLY rethreaded!

I hope you give modelling paste with pan pastels a try as I think it was my favourite thing about this tag! Don't forget to stop by JB Crafting supplies and have a gander at my make next week as well!
See you all then, and happy crafting!
Sam.


Gorgeous Sam, and having seen it in person I can say just how spectacular it really is x
ReplyDeleteThanks Lucy!
Deletethis is fabulous Sam - beautiful work! hugs rachel x
ReplyDeletepusulabet
ReplyDeletesex hattı
https://izmirkizlari.com
rulet siteleri
rexbet
HPEOPR