Do you ever get really excited about a stamp set, some inks or even some new tools and rush out to buy them? Or you find an awesome deal on something and you grab it without really thinking of what you will do with it? While I only do it rarely, I have a whole list of friends who I could probably name that do this on a regular basis.
So I was having a rummage around all of my crafty stash recently, trying to minimise the mountain of unused goodies I have just waiting to make their appearance and I came across this stamp set by Tim Holtz (surprised?). It fit perfectly with this months challenge over at
'A Little Bit Crafty' so what better time to pull it out?? I love red rubber cling stamps, especially the ones that have the image on the back. I took advantage of those images with this card by choosing a few that seemed to fit and arranging them. It gave me a visual to go from when I finally started actually making it. I struggled with the colour choice a bit after I had finally arranged it the way I liked, mainly because I really liked how it looked in the black and grey of the stamps. In the end I took to google. Google and Pinterest are the best places to go for some colour inspiration! There was just so much that of course I couldn't help myself and went with the more colourful choice.
So lets get started:
Supplies Used:
- Tim Holtz Stamp set - The Journey
- Tim holtz Stamp set - Papillon
- TH Distress ink pads-
- Picked Raspberry
- Spiced Marmalade
- Salty Ocean
- Peacock Feathers
- Barn Door
- Squeezed Lemonade
- Ranger Archival Ink - Jet Black
- TH Remnant Rubs - Numbers
- Fine silver embossing powder
- clear embossing powder
- Waterbrush
- Craft mat
- heat tool
- TH Distress crackle paint - Rock candy
- Perfect Pearls perfect gold and water in a spritzer bottle.

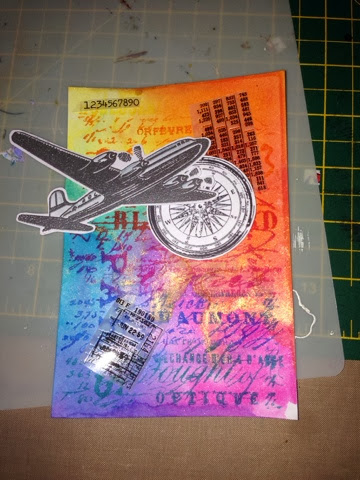
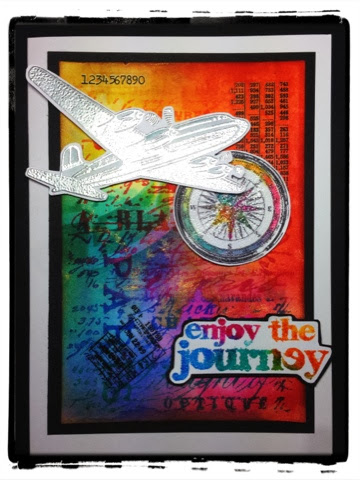
First I took my distress inks and pressed them onto my craft mat. I spritzed it with my gold shimmer water to blend the colours and applied my paper to it. I spritzed the paper again just to make sure it all blended nicely and dried it with the heat tool. Then I applied the corresponding inks to my background stamp in a gradient and stamped onto my now dried paper.
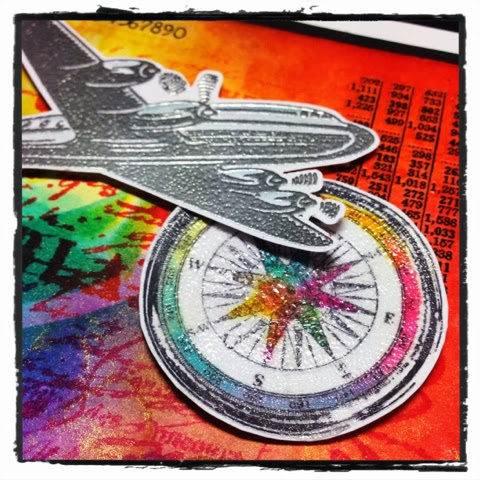
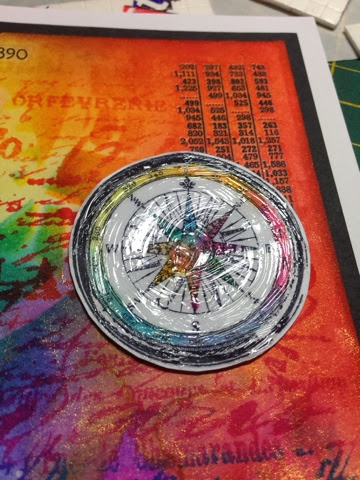
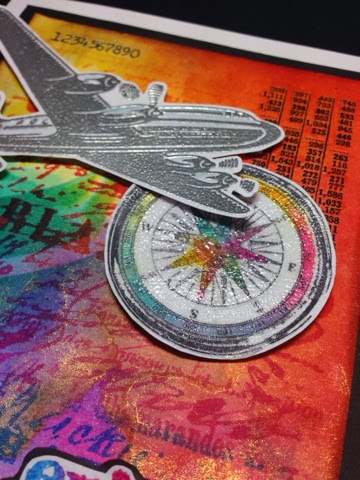
I put the background paper aside and I stamped my plane and embossed with silver embossing powder and stamped the compass with black archival ink because I wasn't sure what waterwork I would be doing just yet. I fussy cut them all out leaving a tiny bit of white to frame it and added a little bit of weathered wood to the plane with my waterbrush just to pop it out from the white. I arranged these on the background just to have a look at the placement and realised my compass needed a bit more. I didn't want to overload it with colour so I used the same colours from the background and did a little painting in some areas just to tie it all in.
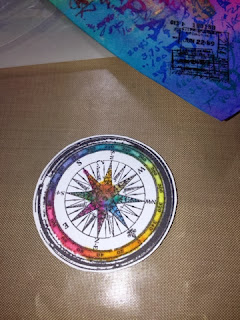
I cut out a few of the remnant rubs and applied them to the background and stuck down my compass. I still wasn't satisfied with it and felt it still needed something so I added some distress crackle in a circular motion, hoping it will crack radiating a bit from the centre.
It didn't quite work out the way I was hoping as I applied it quite thinly but I still like the effect. It looks more like glitter from a distance though so next time I will be more generous with my paint.
Once the paint had dried on my compass I adhered the plane overlapping it slightly with dimensional adhesive.
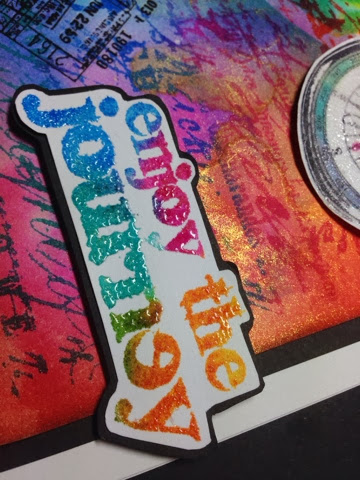
I wanted my sentiment to be embossed with a lot of colours but because my colour selection in my embossing powders is minimal, I ended up stamping with several colours and then embossing over it with clear embossing powder. If I had done it again I might have tried double stamping over it with versamark to give a better coating but it still was fine. I put a black mat on it and stuck it down with some dimensional adhesive.
I matted the whole thing on black card and then mat that onto my card and voila!
I do hope you like it and that, again, you were able to follow my babble. This card particularly applies to me because as this post makes its appearance, I will hopefully be enjoying myself on a beach in Mexico with my family!
Don't forget to check out the challenge blog 'A little Bit Crafty' (and the sponsors!) and enter in your own version of this challenge!

 I am very sorry that I have been slacking in my team duties as far as crafting goes but I swear, I have a good excuse! You see, I have been away on a long 3 week holiday to visit my family. It was a great trip and I am really missing it right now after being back for almost a week now but the feeling was lessened when I came home to find my dt stamp for this month from Julie at JB Crafting Supplies amongst all the bills and junk mail. You can guess which out of the stack I opened first!